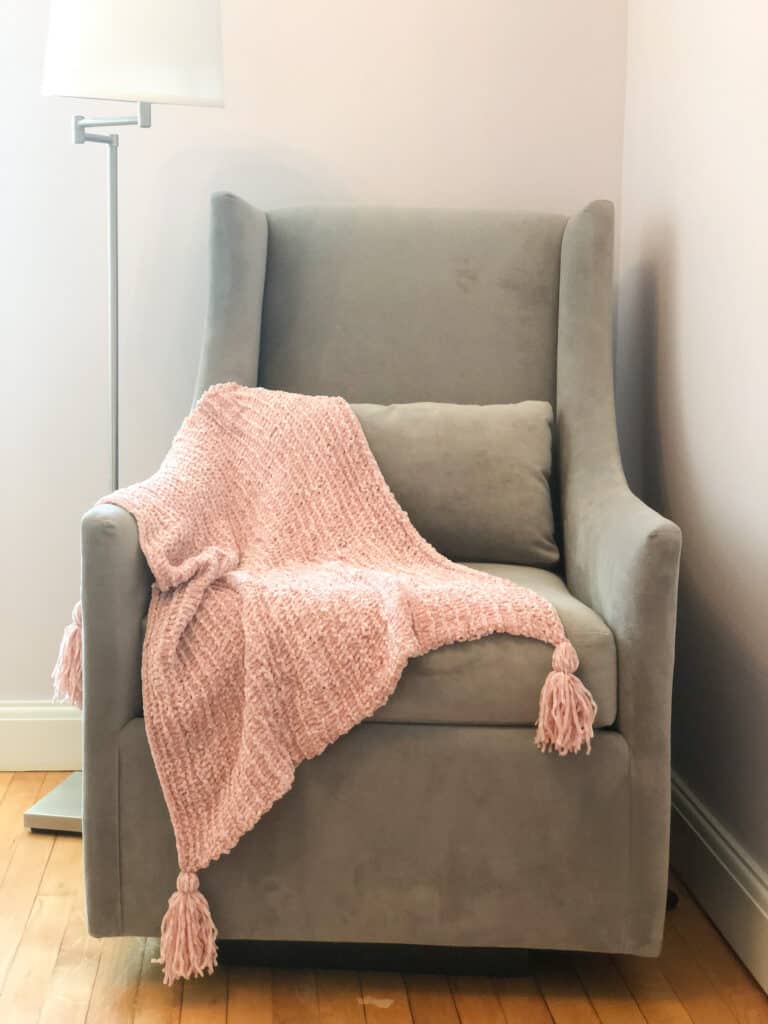
An easy beginner knit blanket pattern my – Woolflower Velvet Yarn Blanket – is a free knitting pattern here on the blog! Read through my inspiration, why I took a year to release this pattern and my suggestions for yarns. Or scroll down for the free pattern.
This post may contain affiliate links. In the event of a sale, I get rewarded a small commission, at no extra cost for you. These funds help me keep my blog up and running to provide you with great content and free patterns so thank you!
Find more Velvet Yarn Knitting Patterns: 21 Snuggly and Free Velvet Yarn Knitting Patterns
Inspiration for a Knit Baby Blanket
This pattern was initially designed as a baby blanket, however, I loved the soft squish of this blanket so much I added additional sizing to it so you can knit a larger Lapghan or Throw blanket for yourself!
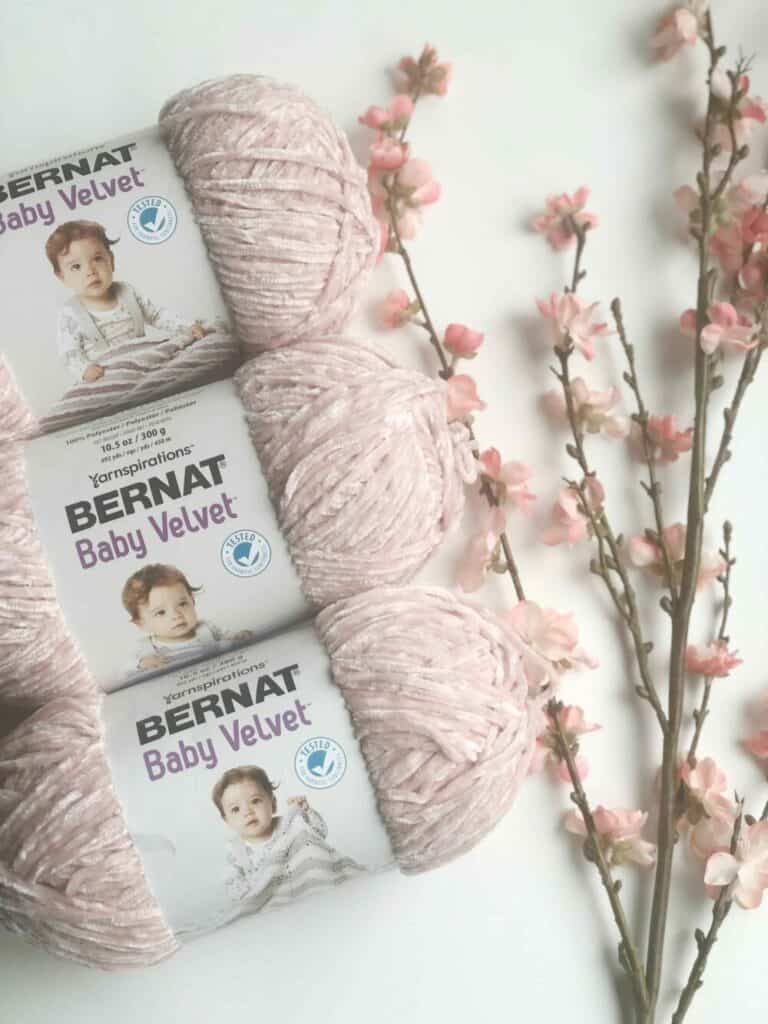
The Woolflower Velvet Yarn Blanket all started in the aisle of a Michaels store. I was there to pick-up some Wool-Ease Thick & Quick for a recent test knit I was doing and, like many crafters, I found myself suddenly distracted by the large display of Bernat Baby Velvet Yarn in the center aisle.
The velvet yarn was so soft I couldn’t stop squishing it. Finally, I gave in and grab a few balls of it with zero ideas as to what I was going to make.
Learning Continental Knitting
Around this same time, I had decided that I was going to attempt to teach myself to knit continental. I was an English knitter who had tried knitting continental in the past but my gauge was always off so I switched back to English. I knew if I wanted to try and knit faster I needed to try and switch.
This blanket design came about as a way for me to practice my continental knitting. It features mostly knit stitches with a few rows of purls mixed in. My goal was to knit the entire blanket continental in hopes that by the end I would feel confident enough to make the switch entirely. I’m happy to say it worked!
If you are looking to switch to continental knitting I highly recommend knitting this blanket as a practice for your muscle memory.
Oh the Frustrations with Velvet Yarn.
This blanket design wasn’t without its frustrations. I highly recommend reading my 5 Easy Tips for Knitting with Velvet Yarn post that I wrote while designing this before you begin knitting. It details some of the challenges that I experienced while working with velvet yarn and how I recommend combating them.
Velvet Yarn Options
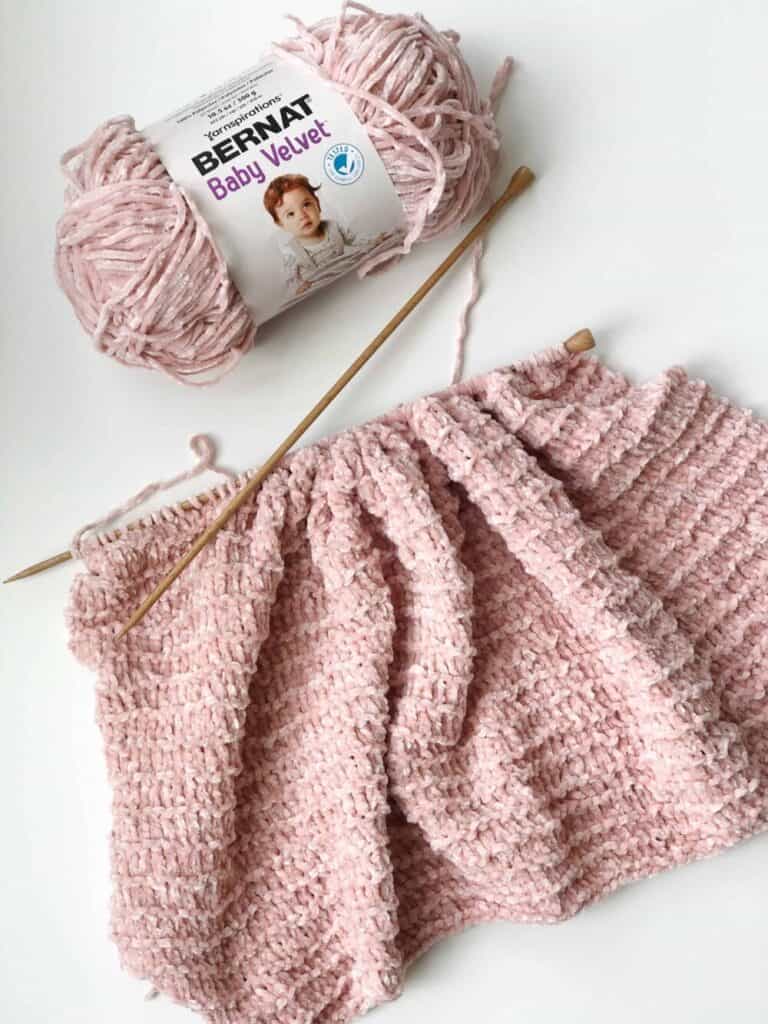
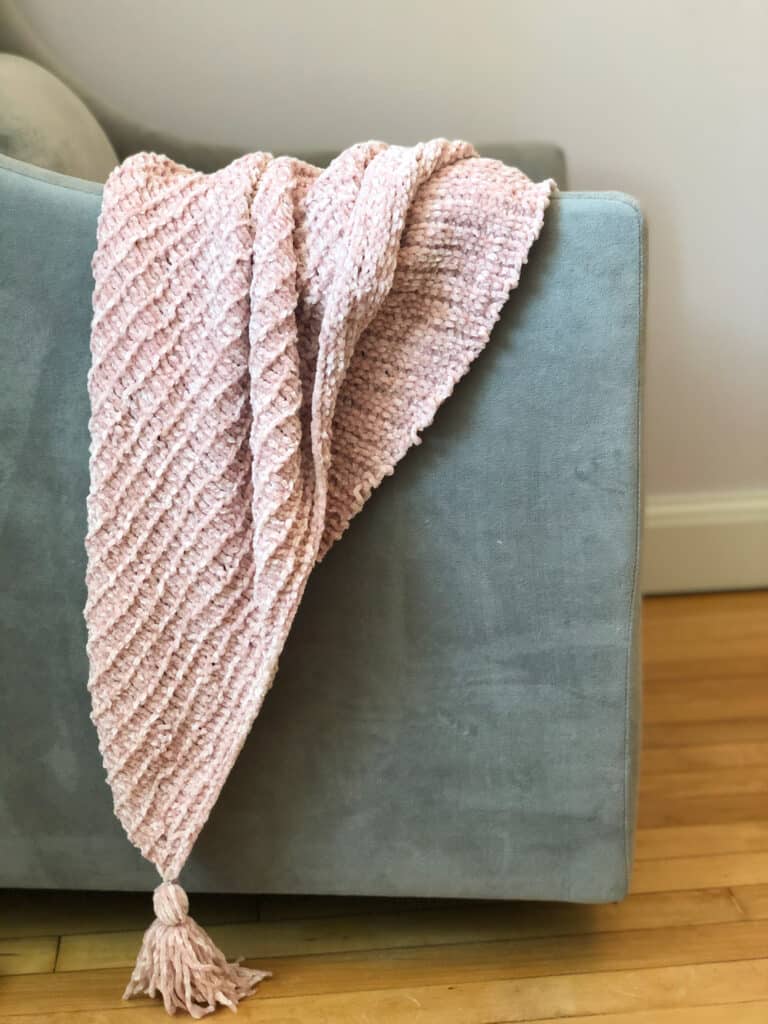
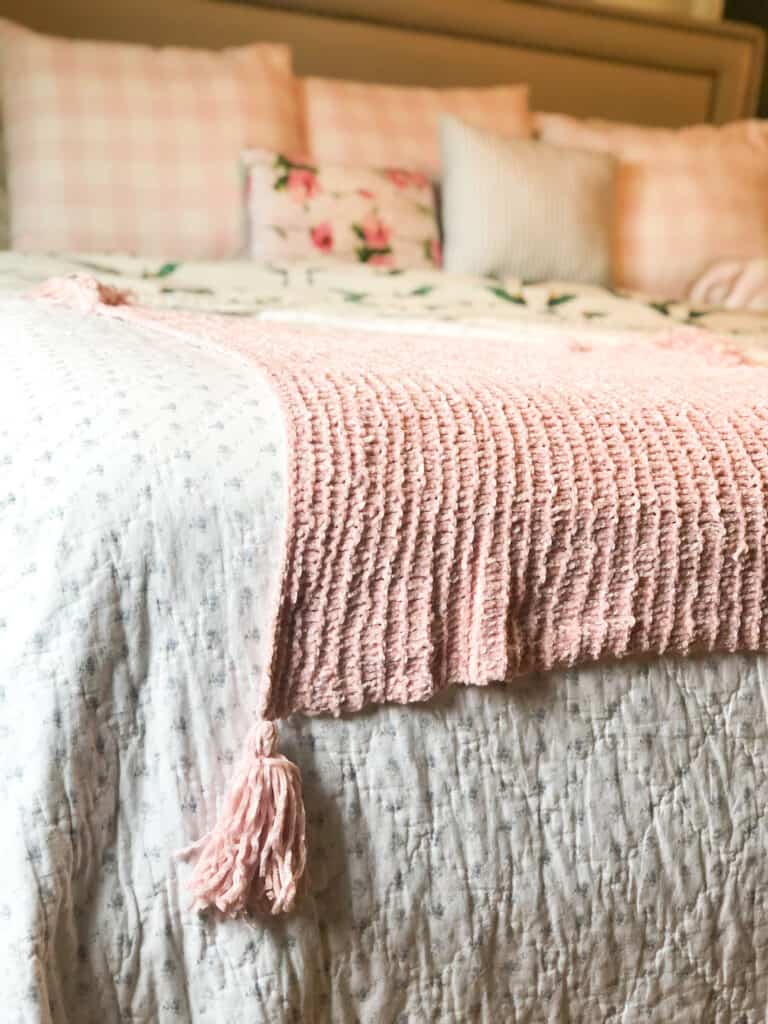
This blanket was knit using Bernat Baby Velvet Yarn in the color Restful Rose. It’s a medium worsted weight yarn and features many soft colors. I also recommend Lion Brand Yarn’s Vel-Luxe for this pattern as it’s also worsted weight and comes in some gorgeous fall colors. I love the Marigold and Emerald colors for fall!
Woolflower Velvet Yarn Knit Blanket Pattern.
- Purchase the ad-free, large print PDF pattern here.
- Add this to your Ravelry queue here.
- Pin it to Pinterest here.
Sizes:
Baby: 30″ Wide x 25″ Tall
Lapghan: 40″ Wide x 35″ Tall
Throw: 50″ Wide x 45″ Tall
Supplies:
yarn:
Worsted weight, medium 4, velvet yarn. The sample is shown in Bernat Baby Velvet. You can also use Lion Brand Yarn’s Vel-Luxe.
- Baby: 480 yards
- Lapghan: 920 yards
- Throw: 1,500 yards
Needles:
- US 8/ 5mm: 32″ / 81cm – 40″ / 102cm long circular needle. (This blanket is knit flat, however, long circular needles are recommended to hold a large number of stitches.) These are the needles I use and love! They come in many different sizes and include different cord lengths.
Notions:
Gauge:
14 sts & 18 rows = 4”/10 cm
Measured over stockinette stitch.
Glossary:
CO – Cast on
k – Knit
p – Purl
Rep – Repeat
RS – Right Side
st/s – Stitch/es
WS – Wrong Side
Pattern:
BLANKET
CO 105 (140, 175) sts using the long tail cast on.
Row 1 (WS): K
Row 2 (RS): K
Row 3: P
Rows 4: K
Repeat rows 1 – 4 until blanket measures 25 (35, 45) inches from cast-on edge.
Cast off all sts.
FINISHING
Weave in ends and add a tassel to each corner.
TASSELS
Make 4 tassels total and attach 1 to each corner of the blanket. For step-by-step photos see this tassel tutorial.
For each tassel:
Step 1: Cut 30 pieces of yarn each about 12″ long.
Step 2: Cut 2 more strands of yarn about 6″ each.
Step 3: Tie one of the longer strands around the middle of your bunch of 30 pieces. These strands are going to be what you use to attach your tassel to the blanket.
Step 4: Fold your bunch in half. Take the second longer strand and tie it around 3/4 of the way up the tassel.
Step 5: Using a tapestry needle, thread the tails of the longer strands that you just tied through the middle of the tassel to hide them.
Step 6: Trim the bottom of your tassel to make it even across the bottom.
Step 7: Thread one of the longer strands at the top of your tassel through a tapestry needle and then through the corner edge of your blanket. Tie the tassel strands around the edging in a knot to secure it.
- Purchase the ad-free, large print PDF pattern here.
- Add this to your Ravelry queue here.
- Pin it to Pinterest here.


I actually have a question. I’m about to start this blanket but am a bit confused. In your tips for knitting with velvet yarn, you say that using 2 strands together helps with stitch conformity, but I’m unclear as to whether or not you used 2 strands together in the blanket. Also, you talk about the yarn being worsted weight but on the Bernat Velvet label, it’s listed as a 5 or Bulky weight yarn. So I don’t know if the size of my needles should still be 8? Any clarity about this would be greatly appreciated as I love the blanket and am anxious to get started.
Thanks!
Angela
Hi Angela, Thank you for your question! The needle size for the baby blanket does help keep it from worming as much. I would recommend doing a gauge swatch with the size 8 needles to see if you meet the gauge listed. Then you will know if you need to stick with those or go up or down. I hope that helps!