Featuring mosaic knitting my – Everly Tea Towel – is a free knitting pattern here on the blog! Read through my inspiration for this pattern, the design process, and why the yarn I chose makes all the difference in the feel and drape of this towel. Or scroll down for the free pattern.
This post may contain affiliate links. In the event of a sale, I get rewarded a small commission, at no extra cost for you. These funds help me keep my blog up and running to provide you with great content and free patterns so thank you!
The Design
This knit tea towel came about simply because I wanted a quick fix weekend knit. My recent designs had included a large brioche shawl, mohair sweater, and I was currently working on a mosaic knit cardigan. I had one sleeve done on my cardigan and had been marooned on the dreaded sleeve island. You know, when you knit one sleeve and have zero interest in knitting the other?
In order to get my knitting mojo back, I thought a quick palette cleanser project could do the trick. My new cardigan design had me falling in love with mosaic knitting and I had been wanting to knit something to add to my knit home decor collection. That’s how the idea for a beautiful tea towel with tassels came to be.
<script async src="https://pagead2.googlesyndication.com/pagead/js/adsbygoogle.js"></script>
<!-- In post horizontal -->
<ins class="adsbygoogle"
     style="display:block"
     data-ad-client="ca-pub-6835687997874512"
     data-ad-slot="6311270057"
     data-ad-format="auto"
     data-full-width-responsive="true"></ins>
<script>
     (adsbygoogle = window.adsbygoogle || []).push({});
</script>
The Yarn
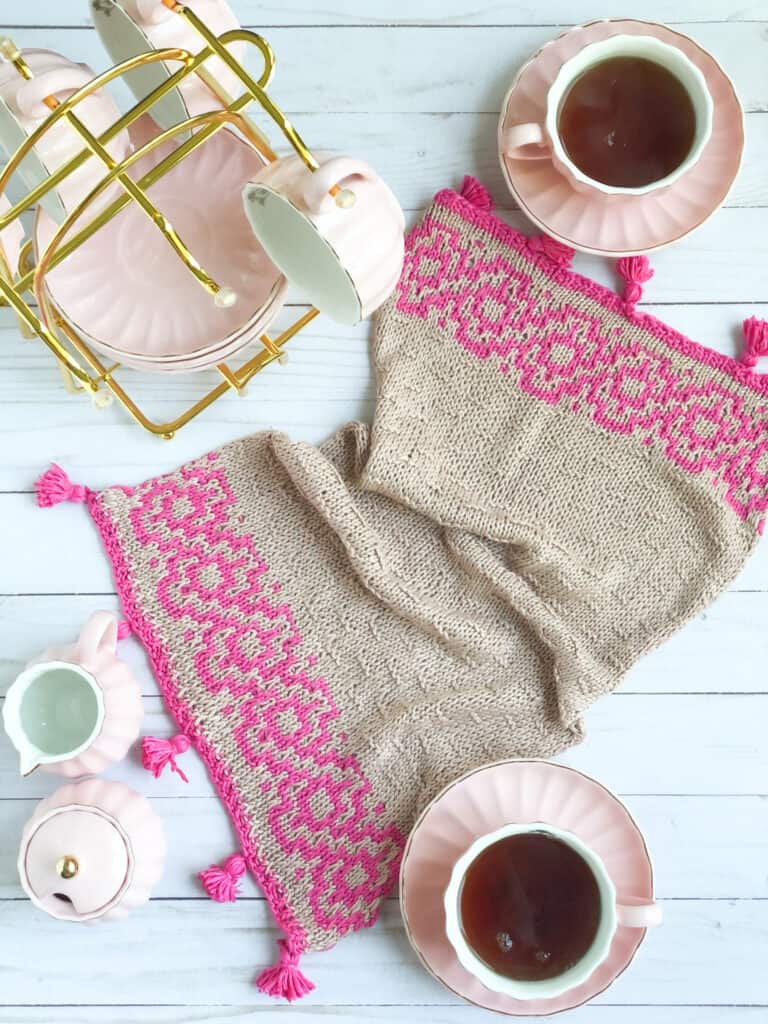
This tea towel looks and feels super elegant and it’s all due to the yarn. I chose to use Lion Brand Yarn’s Truboo which is 100% bamboo, DK weight 3 yarn. The bamboo creates a slight sheen and a gorgeous drape. It’s machine washable too!
If you don’t want to use Turbo I recommend using a cotton fiber yarn like Knit Picks CotLin or Lion Brand Yarn’s Coboo. Both of these are a DK light 3 weight and made with cotton and either linen or bamboo fibers and so would make a nice sturdy tea towel.
Sign up for my newsletter to be notified every time I release a new pattern to the blog!
Everly Tea Towel – Free Knitting Pattern
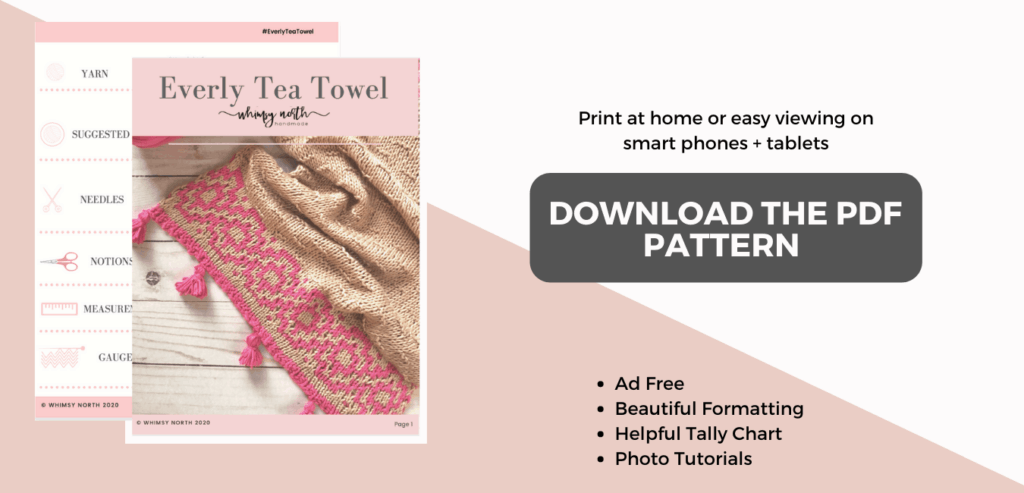
- Purchase the ad-free, large print PDF pattern here.
- Add this to your Ravelry queue here.
- Pin it to Pinterest here.
Construction:
The Everly Tea Towel is knit from one end to the other starting with a contrast color border. Next, the colorwork design is created with mosaic knitting where only one color is used to knit/purl per row. Then the main fabric is done by alternating knit and purl stitches to create texture. Finally another round of mosaic colorwork and contrasting border to the end. The finishing detail is small tassels tied onto each end.
Supplies:
yarn:
- DK weight 3
- MC: 124 yds/113 m
- CC: 50 yds/ 46 m
suggessted yarn:
Lion Brand Yarn – Truboo 100% Bamboo
MC: Tan
CC: Hot Pink
needles:
US 6/4mm needle (These are the needles I use! I love that I can easily switch between needles sizes if I need to size up or down to get gauge)
(Use the needle size you need to achieve gauge)
notions:
finished measurements:
11″ / 28cm Wide x 20″ / 51cm Tall
Gauge:
21 sts & 24 rows = 4”/10cm Measured over stockinette stitch.
(here is a gauge ruler you can use to check before you start knitting.)
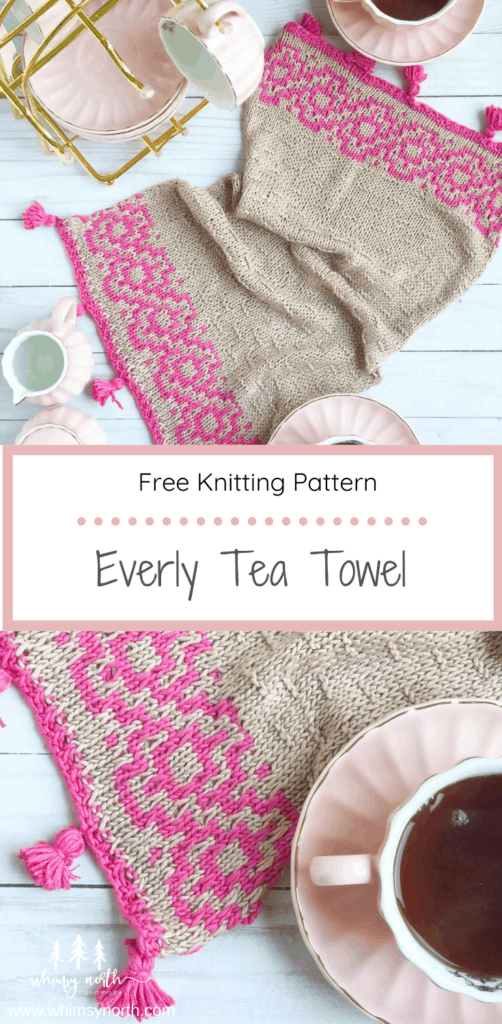
PIN IT!
Glossary:
CO – Cast on
CC – Contrasting Color
k – Knit
ktbl – Knit through the back loop of the stitch MC – Main Color
p – Purl pm – Place Marker
Rep – Repeat
RS – Right Side
sl – Slip stitch purl wise
st/s – Stitch/es
WS – Wrong Side
Directions:
EDGING
With Contrast Color (CC), CO 63 sts using the long tail cast on.
Row 1 (RS): *K1tbl, p1; Rep from * to end of row.
Row 2 (WS): *P1, k1tbl; Rep from * to end of row.
Row 3: Switch to MC, do not break CC. K all sts. Row 4: P all sts.
Repeat Rows 3 and 4, one more time.
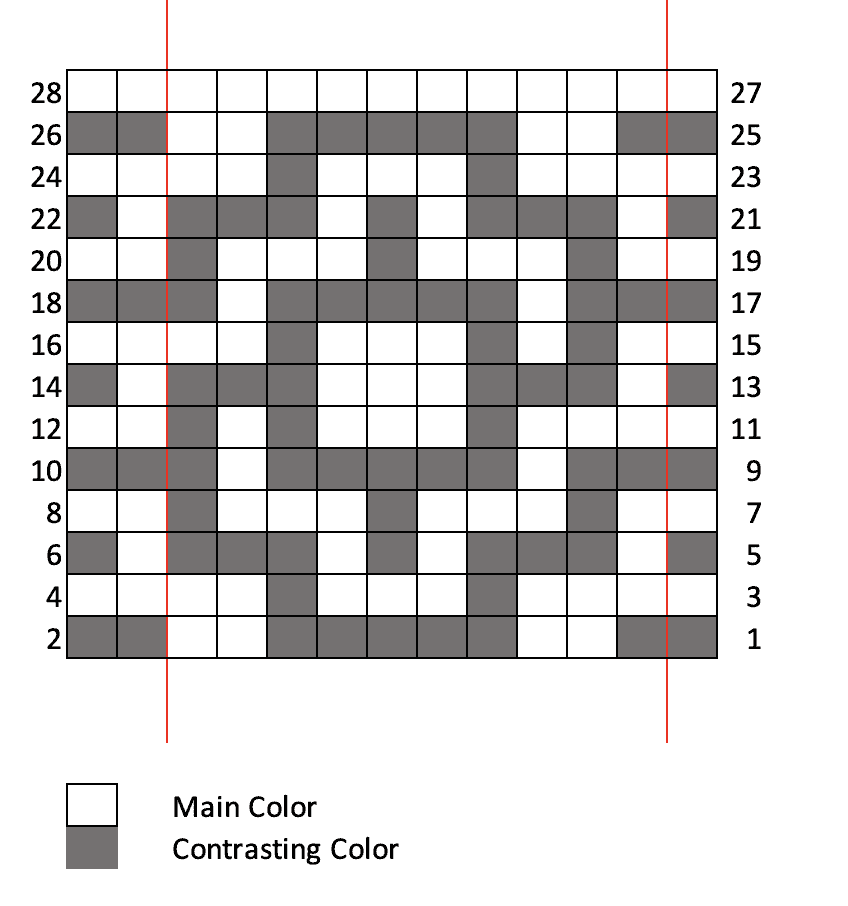
MOSAIC DESIGN
If you prefer to work from a chart please see below. In the first row, you will be placing stitch markers between each pattern repeat to help keep you on track when knitting. Every two rows you will switch between using the MC and CC. The color being used is noted at the beginning of each row.
Row 1 CC (RS): K1, pm, *k1, sl2, k5, sl2, pm; Rep from * to 2 sts before end of row, k2.
Row 2 CC (WS): P2, *sl2, p5, sl2, p1; Rep from * to 1 st before end of row, p1.
Row 3 MC: K1, *k3, sl1, k3, sl1, k2; Rep from * to 2 sts before end of row, k2.
Row 4 MC: P2, *p2, sl1, p3, sl1, p3; Rep from * to 1 st before end of row, p1.
Row 5 CC: K1, *sl1, k3, sl1, k1, sl1, k3; Rep from * to 2 sts before end of row, sl1, k1.
Row 6 CC: P1, sl1, *p3, sl1, p1, sl1, p3, sl1; Rep from * to 1 st before end of row, p1.
Row 7 MC: K1, *k1, sl1, k3, sl1, k3, sl1; Rep from * to 2 sts before end of row, k2.
Row 8 MC: P2, *sl1, p3, sl1, p3, sl1, p1; Rep from * to 1 st before end of row, p1.
Row 9 CC: K1, *k2, sl1, k5, sl1, k1; Rep from * to 2 sts before end of row, k2.
Row 10 CC: P2, *p1, sl1, p5, sl1, p2; Rep from * to 1 st before end of row, p1.
Row 11 MC: K1, *k3, sl1, k3, sl1, k1, sl1; Rep from * to 2 sts before end of row, k2.
Row 12 MC: P2, *sl1, p1, sl1, p3, sl1, p3; Rep from * to 1 st before end of row, p1.
Row 13 CC: K1, *sl1, k3, sl3, k3; Rep from * to 2 sts before end of row, sl1, k1.
Row 14 CC: P1, sl1, *p3, sl3, p3, sl1; Rep from * to 1 st before end of row, p1.
Row 15 MC: K1, *k1, sl1, k1, sl1, k3, sl1, k2; Rep from * to 2 sts before end of row, k2.
Row 16 MC: P2, *p2, sl1, p3, sl1, p1, sl1, p1; Rep from * to 1 st before end of row, p1.
Row 17 CC: K1, *k2, sl1, k5, sl1, k1; Rep from * to 2 sts before end of row, k2.
Row 18 CC: P2, *p1, sl1, p5, sl1, p2; Rep from * to 1 st before end of row, p1.
Row 19 MC: K1, *k1, sl1, k3, sl1, k3, sl1; Rep from * to 2 sts before end of row, k2.
Row 20 MC: P2, *sl1, p3, sl1, p3, sl1, p1; Rep from * to 1 st before end of row, p1.
Row 21 CC: K1, *sl1, k3, sl1, k1, sl1, k3; Rep from * to 2 sts before end of row, sl1, k1.
Row 22 CC: P1, sl1, *p3, sl1, p1, sl1, p3, sl1; Rep from * to 1 st before end of row, p1.
Row 23 MC: K1, *k3, sl1, k3, sl1, k2; Rep from * to 2 sts before end of row, k2.
Row 24 MC: P2, *p2, sl1, p3, sl1, p3; Rep from * to 1 st before end of row, p1.
Row 25 CC: K1, *k1, sl2, k5, sl2; Rep from * to 2 sts before end of row, k2.
Row 26 CC: P2, *sl2, p5, sl2, p1; Rep from * to 1 st before end of row, p1.
Row 27 MC: K all sts. Row 28 MC: P all sts.
Break CC.
MAIN FABRIC
With Main Color. On the first row, remove markers as you come to them.
Row 1 (RS): Sl1, *k3, p3; Rep from * to 2 sts before end of row, k2.
Row 2 (WS): Sl1, p across.
Row 3: Sl1, k across.
Row 4: Sl1, p across.
Row 5: Sl1, *p3, k3; Rep from * to 2 sts before end of row, k2.
Row 6: Sl1, p across.
Row 7: Sl1, k across.
Row 8: Sl1, p across.
Repeats Rows 1 – 8, nine more times for a total of 10 repeats.
MOSAIC DESIGN
Repeat the mosaic design section Rows 1 – 28 once more. Do not break CC.
EDGING
Row 1 MC: K all sts.
Row 2 MC: P all sts. Break MC
Row 3 CC: Using CC. *K1tbl, p1; Rep from * to end of row.
Row 4 CC: *P1, k1tbl; Rep from * to end of row.
Cast off all sts in pattern (k1tbl, p1).
FINISHING
Weave in ends and block your towel by soaking it in luke warm water, along with your favorite wool wash, for 15 minutes. Squeeze out excess water with a towel and lay flat to dry. Don’t block on towels as it can retain moisture and not allow your finished towel to dry.
TASSELS
Make 10 tassels total and attach 5 to each end of the towel spread out evenly. See this tutorial on how to construct your tassels.
For each tassel:
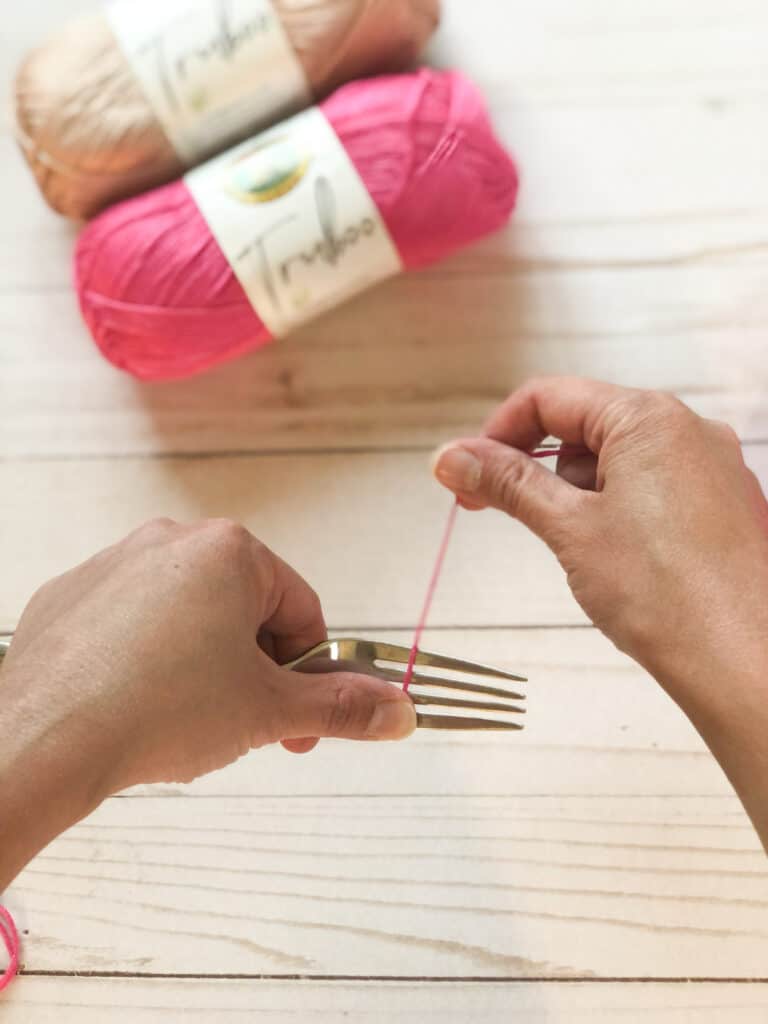
Step 1: Cut 30 pieces of CC each about 2″ long. I like to wrap my yarn around a fork 30 times and then cut it across at the bottom to measure. (See photo)
Step 2: Cut 2 more longer strands of yarn about 6″ each.
Step 3: Tie one of the longer strands around the middle of your bunch of 30 pieces. These strands are going to be what you use to attach your tassel to the towel.
Step 4: Fold your bunch in half. Take the second longer strand and tie it around 3/4 of the way up the tassel.
Step 5: Using a darning needle, thread the tails of the longer strands that you just tied through the middle of the tassel to hide them.
Step 6: Trim the bottom of your tassel to make it even across the bottom.
Step 7: Thread one of the longer strands at the top of your tassel through a darning needle and then through the edging of your towel. Tie the tassel strands around the edging in a knot to secure it.


Beverly Tea Towel On the Mosaic Design on Row 1 CC (RS) K2, pm. What is ‘pm’?
Yes, it means, place marker. It looks like I missed putting that in the glossary so I will add it. Thank you!
I love the pattern, but I can’t find a key to the graph.
Thanks in advance for your help.
Thank you for reaching out! It looks like that section was cut-off in the image. I have updated it with the key. Please let me know if you have any other questions regarding the pattern. – Margaret
Hello there! I could have sworn I’ve visited your blog before
but after browsing through many of the posts I realized it’s new to me.
Anyways, I’m certainly pleased I found it and I’ll be bookmarking it and checking
back regularly!