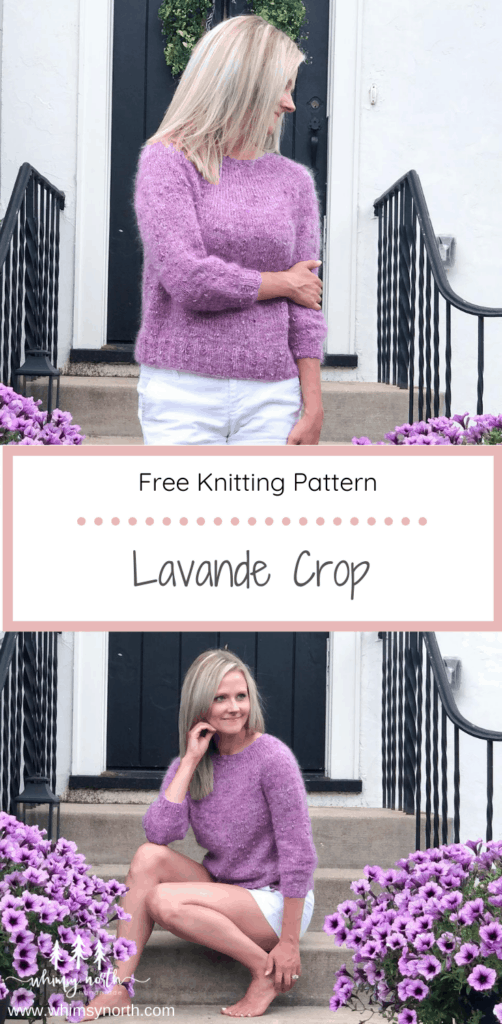
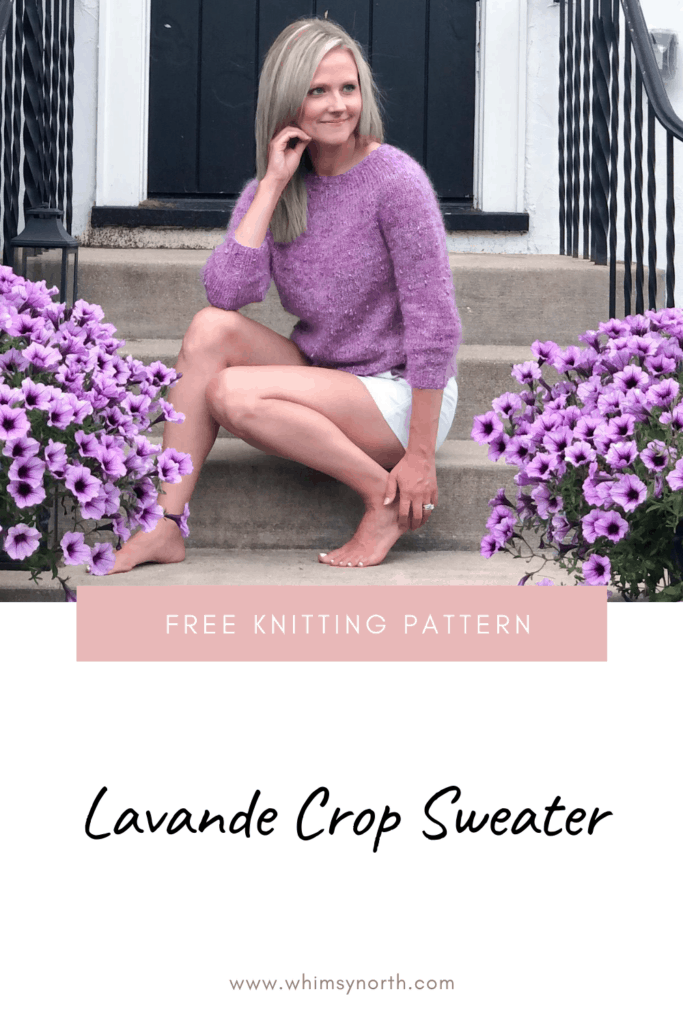
Lavande Crop – FREE Easy Sweater Knitting Pattern
An easy knit sweater pattern my – Lavande Crop – is a free seamless yoke sweater knitting pattern here on the blog! Read through my inspiration, why I had to start all over during the design process, and my suggestions for yarns. Or scroll down for the free pattern.
This post may contain affiliate links. In the event of a sale, I get rewarded a small commission, at no extra cost for you. These funds help me keep my blog up and running to provide you with great content and free patterns so thank you!
Slub and Mohair get married.
My inspiration for this sweater came one day as I was scrolling through Instagram (how many of my designs begin). I passed by an Independent yarn dyer’s feed and saw the most beautiful and fun textured slub yarn for sale. Slub is a fingering weight yarn that has little nubs attached throughout.
When I clicked over to the dyer’s Etsy Shop (Cornbread and Honey) I began scrolling through all of her beautiful hand-dyed slub yarn options. Then I spotted the mohair and the design idea came to me. If I held the slub together with the mohair I wonder what texture that would produce? I clicked order and a week later some super soft and fun textured yarn was at my door!
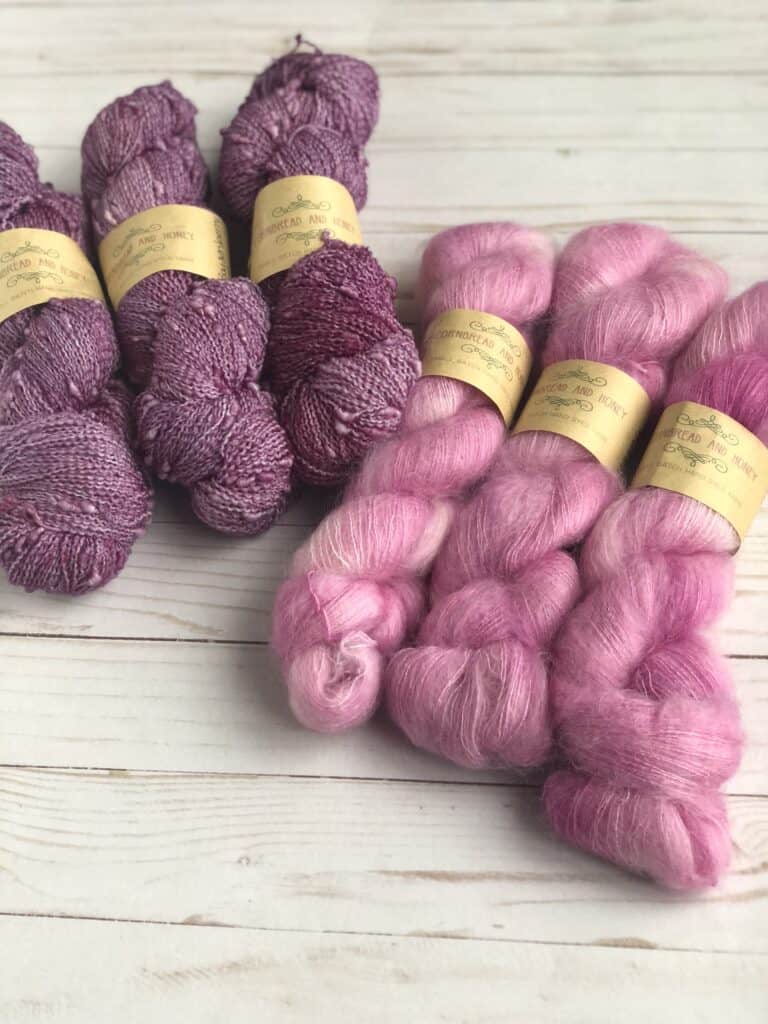
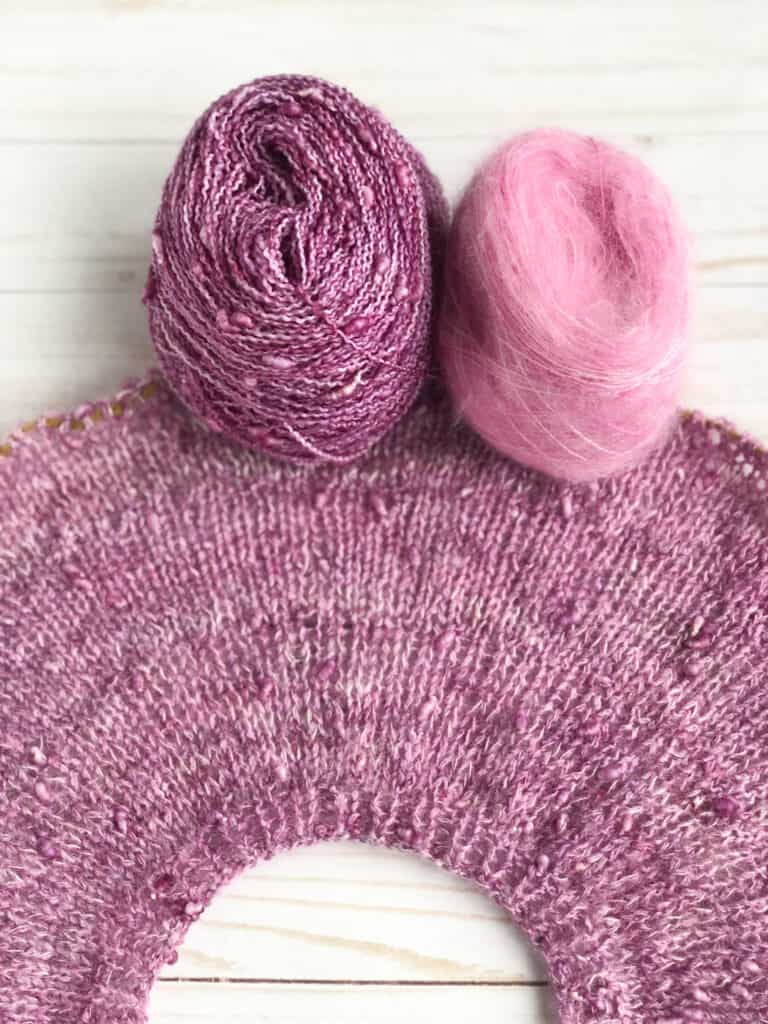
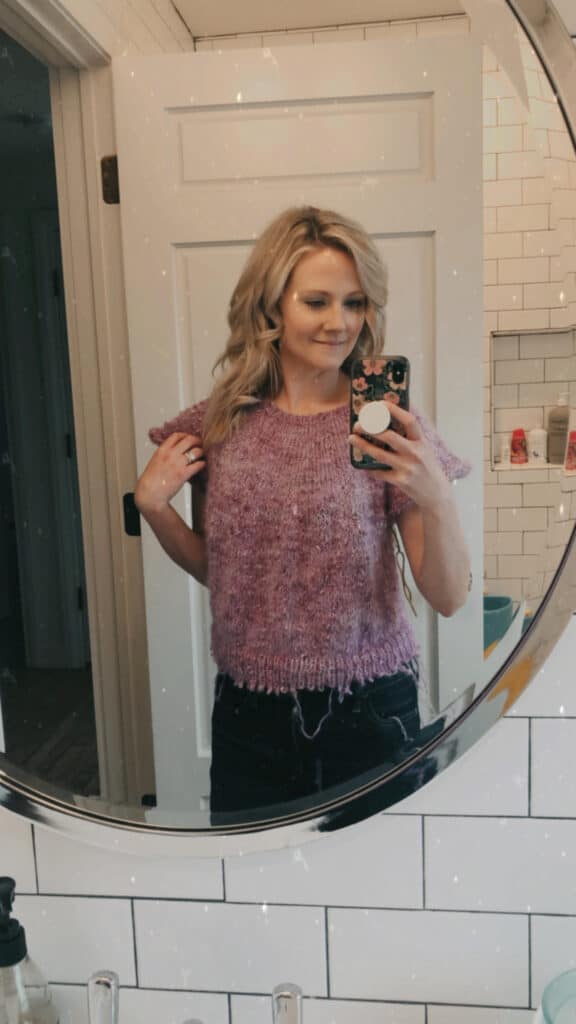
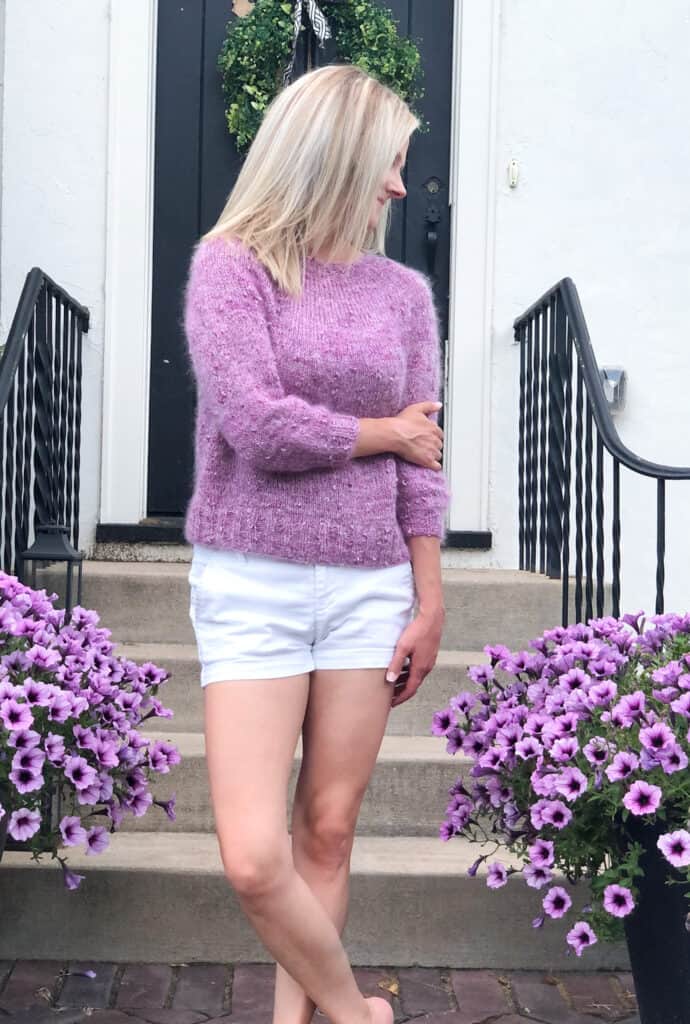
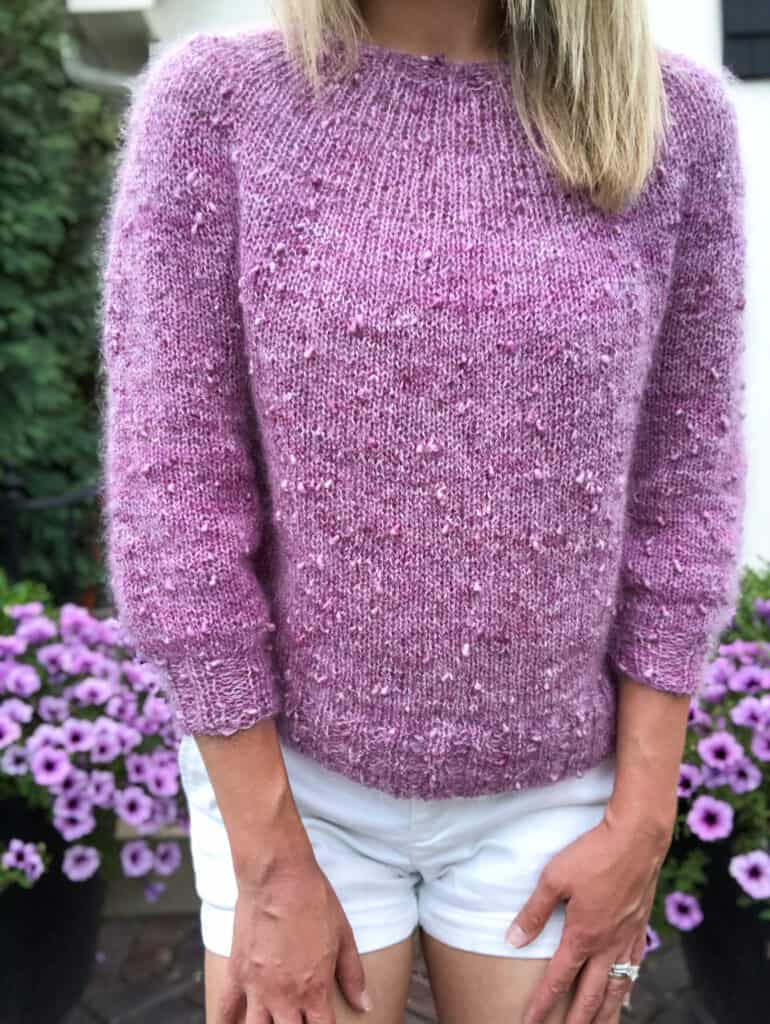
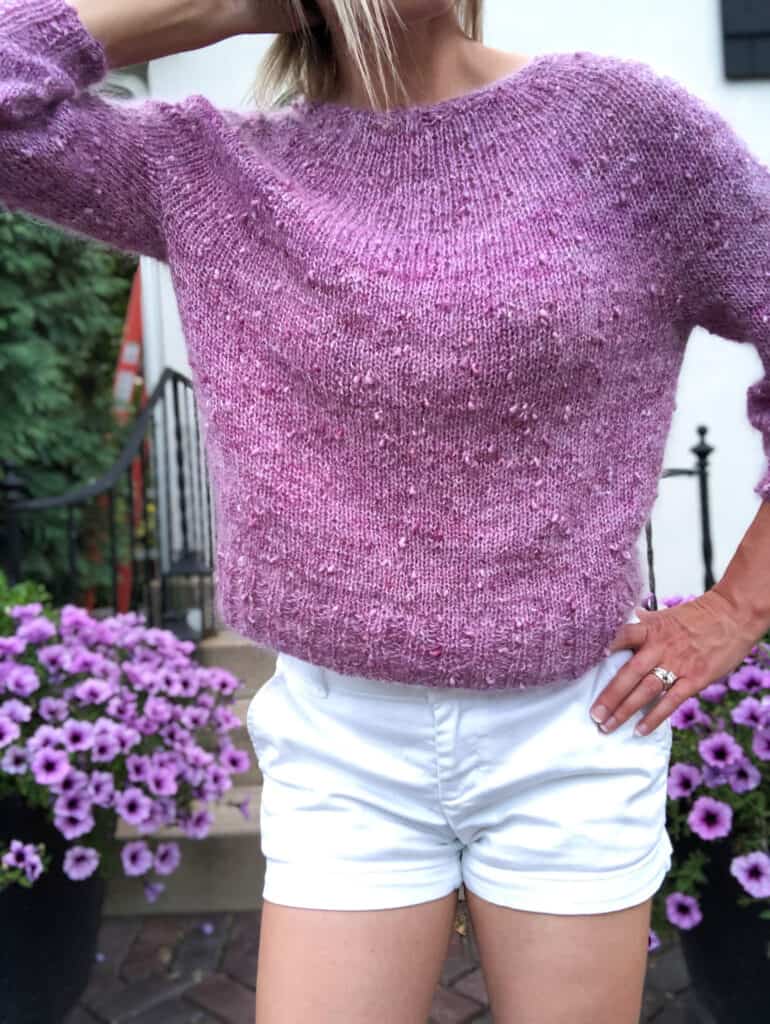
The result of my experiment was exactly what I hoped it would be. The slub added a fun textural element to an otherwise classic sweater design and the mohair made it as soft as a cloud. It created a super soft halo effect that really classes up this sweater.
How to Frog Mohair.
This design wasn’t without challenges, however. As it was my second sweater design coming in after my Glimmer Crop I was still learning about how to make garments fit properly. My first attempt at this sweater turned out too wide for my liking. You can see in my Instagram Story photo below that it’s a little baggy. What you don’t see is all the fabric gathered in the back via a chip clip!
I knew that if I made it too large I wouldn’t wear it and when it comes to mohair you want to wear it! This is when I had to decide whether to start over or simply finish it to be done. I chose to start over. The tricky part was, mohair can be a bit sticky and therefore a challenge to frog or rip out. I did some online research and read that sticking the project in the freezer might help and I was willing to try anything!
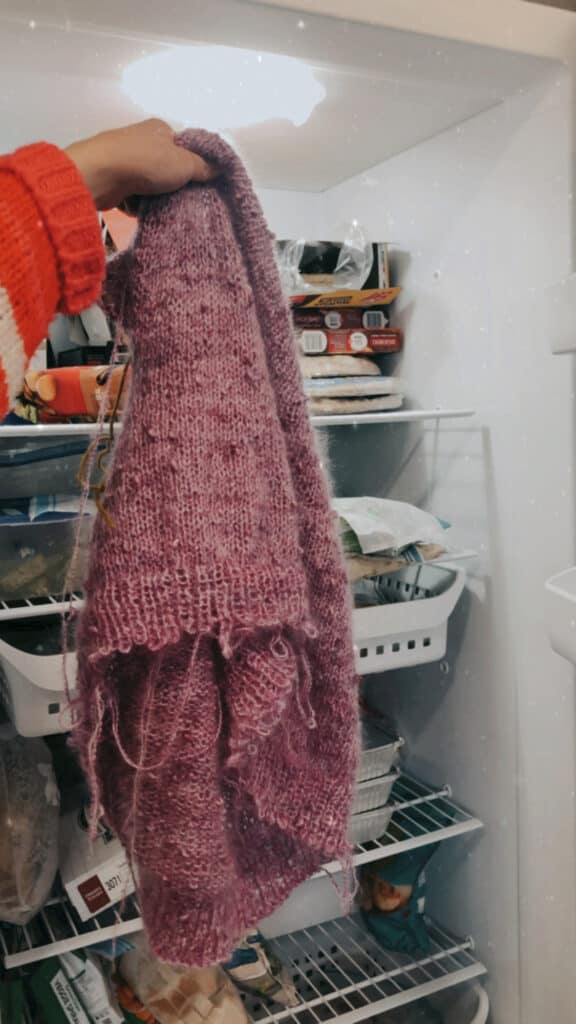
It said that freezing the fibers makes them less sticky and therefore easier to frog. I’m not sure whether it made a difference or not but frogging was not as much of an issue as I thought it would be. After an overnight of hanging out next to the frozen peas, my sweater was wound back to balls of yarn.
Attempt number two turned out much better and I learned a lot about garment ease and how to increase stitches within a yoke.
Lavender Fields in France
I designed this sweater during the Covid-19 pandemic of 2020 and while I was stuck at home with my family I began to feel a bit of wanderlust. This caused me to become slightly obsessed with France and everything French.
I dreamed of traveling to France and drinking the wine and eating the food. I read books like French Women Don’t Get Fat and ordered French wine from Wine Insiders (Use this link to get $25 off your first $50 purchase at Wine Insiders!) I watched movies like A Good Year with Russel Crowe and the documentary A Year In Burgundy. I even had a few cocktail hours with my daughters and served a charcuterie board along with wine for me and lemonade for them. All while my Echo Show played French cafe music in the background.
Sound a little nuts? I’m sure I’m not the only one who went a little coo coo while being stuck at home with their family for months, am I? And what does this all have to do with a sweater? It’s all in a name.
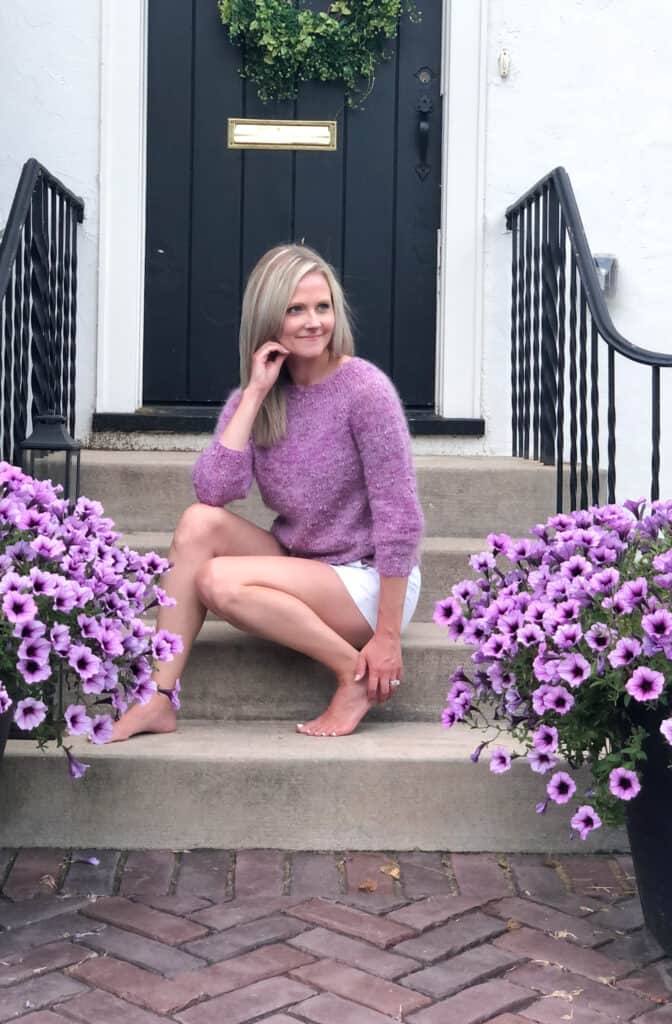
This classy mohair sweater made me think of the lavender fields of France that I one day wished to visit and I knew based on my current French obsession that naming it Lavande (French for Lavender) would be the perfect reminder of my Covid Summer in France.
Sign up for my newsletter to be notified every time I release a new pattern to the blog!
So now that you know the story behind the sweater it’s time for the pattern.
Lavande Crop – Easy Mohair Knit Sweater Pattern
- Purchase the ad-free, large print PDF pattern on Etsy here.
- Add this to your Ravelry queue here.
- Pin it to Pinterest.
Construction:
The Lavande Crop is a seamless, top down circular yoke sweater knit holding one strand of slub yarn and one strand of mohair together. The finished sweater is light, airy and full of texture. It’s perfect for crisp summer nights and warm fall weather.
What Length?
The instructions for this sweater are given for a slightly cropped body and 3/4 length sleeve. Both of these can be lengethend or shortened depending on your preferred length. Please keep in mind that you may need additional yarn.
PIN IT!
Supplies:
Yarn:
Fingering weight slub + lace weight mohair held together or single fingering weight.
Sample yarn used:
- Cornbread and Honey Slub – Boysenberry 438 yards/ 100 grams
- Cornbread and Honey Mohair – Magenta 459 yards / 50 grams
Alternate yarn options:
Yardage:
Slub: 715 (793, 872, 960, 1055, 1160) [1276, 1403, 1544] yards 654, (725, 797, 878, 965, 1061) [1167, 1283, 1412] m
Mohair: 608 (676, 744, 818, 900, 990) [1089, 1197, 1320] yards 556 (618, 680, 748, 823, 905) [996, 1094, 1207] m
NOTE: Yardage/meterage is an estimate and may change based on your yarn selection, personal gauge, or any modifications you make.
Needles:
US 7/4.5 mm – 16″/40cm to 40″/100cm circular and/or preferred needles for small circumference knitting for sleeves (Magic Loop or DPNs).(Or needle size you need to achieve gauge.) These are the interchangeable needles I use and love!
Important Note on Gauge: My test knitters ended up using anywhere from a US 3 to a US 8 knitting needle based on their own personal tension and gauge so I highly recommend checking your gauge using a gauge ruler before you start knitting to ensure your sweater doesn’t come out too big or too small. If you have a set of interchangeable needles it makes the process of going up or down a size so much easier!
Gauge:
16 sts & 24 rounds = 4”/10 cm
Measured after blocking over stockinette stitch.
Notions:
- Tapestry Needle
- Scissors
- Scrap Yarn
- Stitch Marker
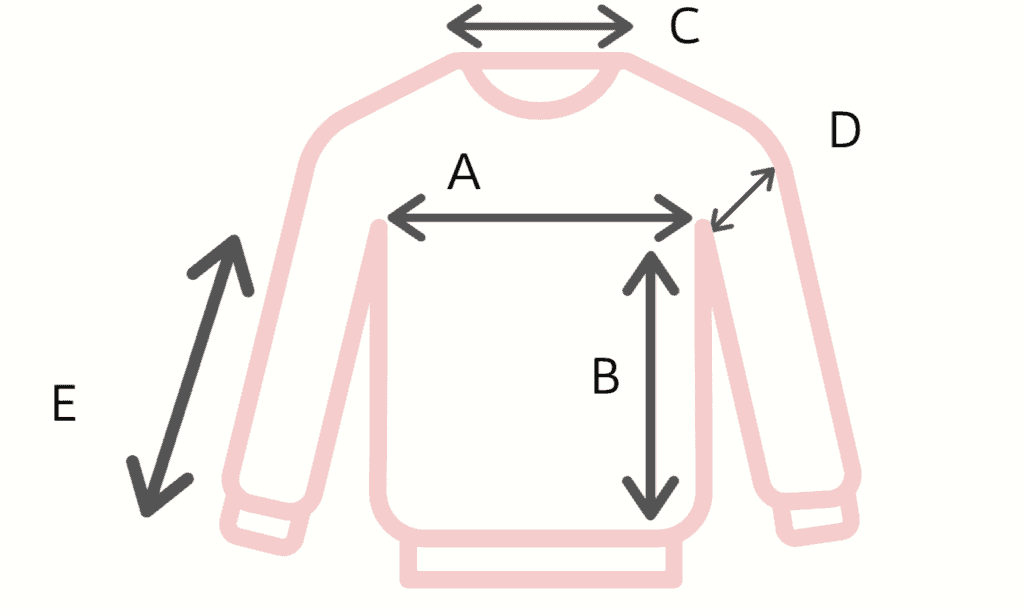
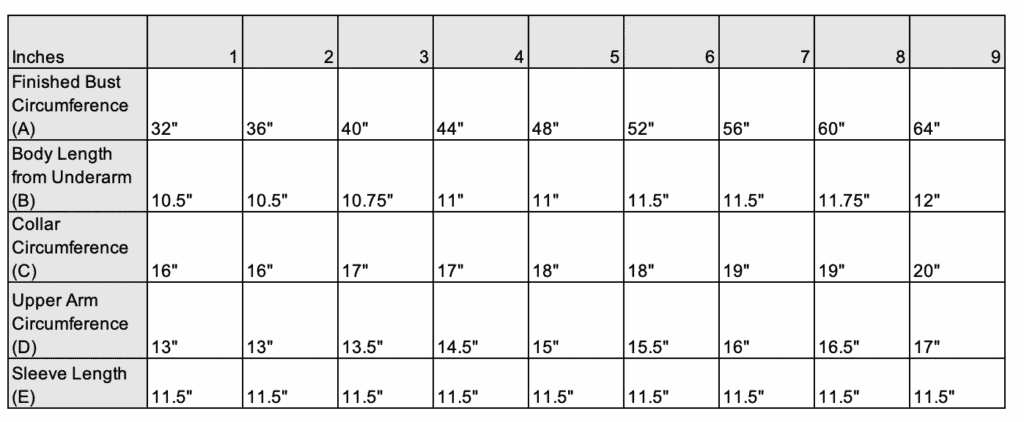
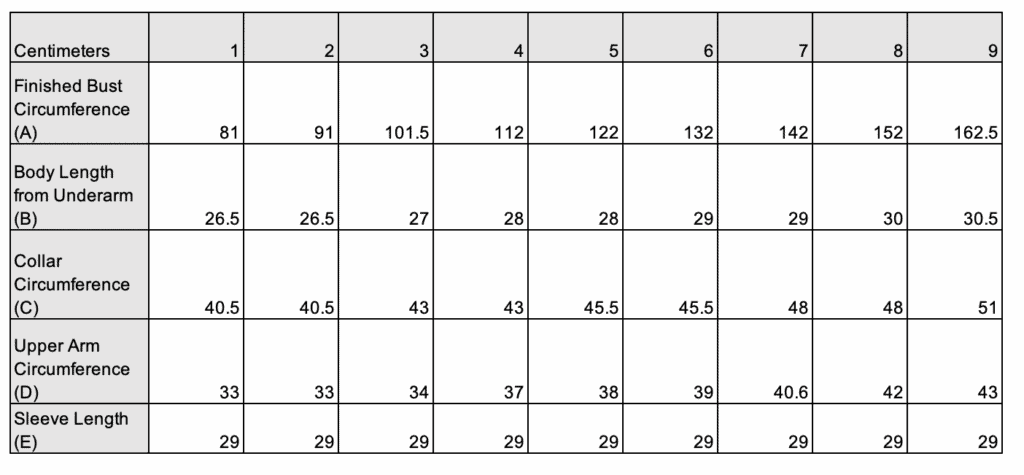
Sizing:
Measurements given are for the finished garment. This sweater is designed to fit with 2″ [5 cm] of positive ease at the bust. See schematic below for full fit details before selecting a size.
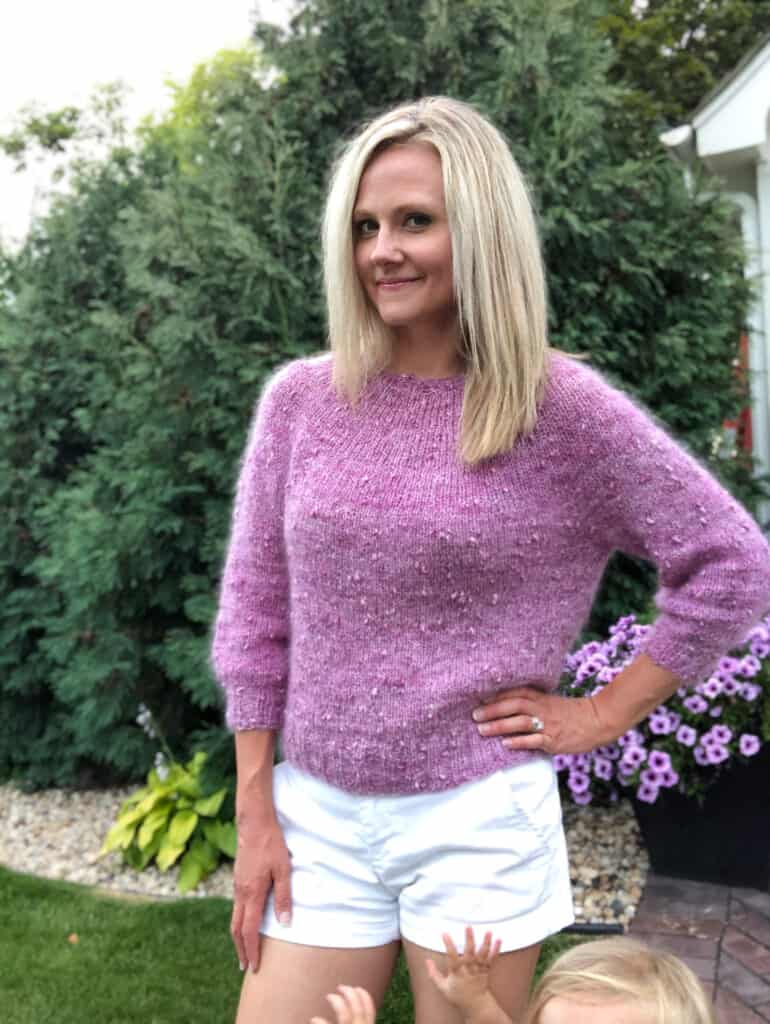
Sample pictured is a size 2 on a model with a 34″ bust [86cm] worn with a 2″ [5cm] of positive ease.
Sizes: 1 (2, 3, 4, 5, 6) [7, 8, 9]
Glossary:
*..* – Repeat
BOR – Beginning of round CO – Cast on
dec – Decrease
inc – Increase
k – Knit
m1L – Make one left-leaning p – Purl
pm – Place marker
Rep – Repeat
st/s – Stitch/es

Directions:
COLLAR
Holding one strand of slub yarn together with one strand of mohair, CO 64 (64, 68, 68, 72, 72) [76, 76, 80] sts using the Twisted German Cast On and join in the round, be careful not to twist sts. Pm to mark the beginning of the round (BOR).
Rounds 1-6: *K2, p2; Rep from * to BOR.
Round 7: K around to BOR.
YOKE
You will now work the yoke of your sweater with four increase rounds.
INCREASE ROUND 1
*K2, m1L; Rep from * to BOR.
96 (96, 102, 102, 108, 108) [114, 114, 120] total sts.
Now knit until your yoke (not including your collar) measures 2 ( 2, 2.25, 2.5, 2.5, 2.75) [2.75, 3, 3] inches. / 5 (5, 5.75, 6, 6, 7) [7, 7.5, 7.6] cm
INCREASE ROUND 2
*K3, m1L; Rep from * to BOR.
128 (128, 136, 136, 144, 144) [152, 152, 160] total sts.
Next Round: Increase 1 (1, 2, 2, 0, 0) {1, 1, 2] sts by doing a m1L anywhere throughout the round.
129 (129, 138, 138, 144, 144) [153, 153, 162]
Now knit until your yoke (not including your collar) measures 4 ( 4, 4.5, 4.75, 5, 5) [5.25, 5.5, 6] inches. / 10 (10, 11.5, 12, 12.5, 12.5) [13, 14, 15] cm
INCREASE ROUND 3
*K3, m1L; Rep from * to BOR.
172 (172, 184, 184, 192, 192) [204, 204, 216] total sts.
Now knit until your yoke (not including your collar) measures 6 (6, 6.5, 7, 7.25, 7.5) [7.75, 8, 8.5] inches / 15 (15, 16.5, 17.5, 18.5, 19) [19.5, 20, 21.5] cm.
INCREASE ROUND 4
*K4, m1L; Rep from * to BOR.
215 (215, 230, 230, 240, 240) [255, 255, 270] total sts.
Now knit until your yoke (not including your collar) measures 8 ( 8, 8.5, 9, 9.5, 9.75) [10, 10.5, 11] inches / 20 (20, 21.5, 23, 24, 25) [25.5, 26.5, 28] cm.
ADDITIONAL INCREASE/DECREASE ROUND
In the next round you will be increasing or decreasing additional sts in order to make your front, back and arm sections evenly split.
SIZE 1: *K1, k2tog; Rep from * twice more, k to 12 before BOR, *k1, k2tog; Rep to BOR. [7 sts dec, 208 sts total]
SIZE 2: *K1, m1L, k to BOR [1 st inc, 216 sts total]
SIZE 3: *K1, m1L; Rep from * twice more, k to 3 sts before BOR, *m1L, k1; Rep from * to BOR. [6 sts inc, 236 sts total]
SIZE 4: K10, *m1L, k7; Rep from * to 10 sts before BOR, k10. [30 sts inc, 260 sts total]
SIZE 5: *K10, m1L; Rep from * to BOR. [24 sts inc, 264 sts total]
SIZE 6: K10, *k5, m1L; Rep from * to 10 sts before BOR, K10. [44 sts inc. 284 sts total]
SIZE 7: K5, *k5, m1L; Rep from * to 5 sts before BOR, k5. [49 sts inc. 304 sts total]
SIZE 8: K5, *k4, m1L; Rep from * to 6 sts before BOR, k6. [61 sts inc. 316 total]
SIZE 9: K3, *k4, m1L; Rep from * to 3 sts before BOR, k3. [66 sts inc. 336 total]
SEPARATE BODY + SLEEVES
K60 (64, 72, 80, 84, 92) [100, 106, 114] sts, place the next 44 (44, 46, 50, 48, 50) [52, 52, 54] sts on hold for right sleeve, CO 4 (8, 8, 8, 12, 12) [12, 14, 14] sts using backwards loop method, k60 (64, 72, 80, 84, 92) [100, 106, 114] sts, place next 44 (44, 46, 50, 48, 50) [52, 52, 54] sts on hold for left sleeve, CO 4 (8, 8, 8, 12, 12) [ 12, 14, 14] sts using backwards loop method, k to BOR.
128 (144, 160, 176, 192, 208) [224, 240, 256] body sts.
BODY
K all sts until your body measures 8 (8, 8.25, 8.5, 8.5, 9) [9, 9.25, 9.5] inches / 20 (20, 21, 21.5, 21.5, 23) [23, 23, 24] cm from armpit, or desired length minus 2.5″ / 6cm for bottom ribbing. Note, more length will increase yardage needed.
BOTTOM RIBBING
Round 1: *K2, p2; Rep from * to BOR.
Repeat round 1 until ribbing measures 2.5″ /6cm.
Bind off all sts loosely (in k2, p2 pattern).
SLEEVES (Same for both)
Move held sleeve sts onto needle for your preferred method of small circumference knitting (either Magic Loop or DPNs). Starting at the underarm, knit around picking up and knitting 4 (8, 8, 8, 12, 12) [12, 14, 14] underarm sts when you come to them. PM in the approximate center of these underarm sts to mark BOR.
48 (52, 54, 58, 60, 62) [64, 66, 68] sts.
Now knit until your sleeve measure 9.5″ / 24cm from your underarm, or desired length minus 2″ / 5cm for bottom ribbing. Note, more length will increase yardage needed.
DECREASE ROUND
K0 (2, 1, 3, 2, 1) [0, 1, 2], *k2tog; Rep from * to 0 (2, 1, 3, 2, 1) [0, 1, 2] sts before BOR, k remaining sts.
24 (28, 28, 32, 32, 32) [32, 32, 32] remaining sleeve sts.
SLEEVE RIBBING
Round 1: * K2, p2; Rep from * to BOR.
Repeat round 1 until ribbing measures 2″ / 5cm.
Bind off all sts loosely (in k2, p2 pattern).
FINISHING
Weave in ends and sew up any holes near underarms if necessary. Block your finished garment according to below measurements.
- Purchase the inexpensive, ad-free, PDF here.
- Add this pattern to your Ravelry queue here.
- Pin this on Pinterest here.
- Find more FREE knitting patterns here.
Make sure to share your finished Lavande Crop sweater on Instagram and use #lavandecrop and tag @whimsynorth so I can share it!


I would like to make LAvande with Classic Elite Camden Cotton. What do you think?
It looks like that may be an Aran weight yarn which is much heavier than the recommended fingering weight. I would do a test swatch first to make sure you get the proper gauge and then check the fabric your gauge makes to see if you like the way it drapes. You may find the fabric is a little stiff if it’s a heavier yarn. Let me know if that helps!
Hi! Thank you so much for this free pattern I was eyeing it for a long time now and decided to knit it for my daughter. I have one question. Does the BOR fall at the back of the left shoulder? Because if so (I am knitting size 3) the last increase row before splitting up for body and sleeves means that there will be a six stitches increase at the back of one shoulder? Is that correct or do I do something wrong somewhere?
Thank you for your time!
Christina Truter
The BOR should land in the back middle. Without taking a look at your current work in progress I’m not sure where the possible mix-up could be. Let me know if I can help in any other way!
I am a beginner to sweaters. All of the sweaters I have purchased have the back of the sweater collar higher than the front so it doesn’t slip and choke me. I did not see any short rows in the pattern. Is this not necessary on this type of pattern or if I wanted them. where would I insert them?
Hi! You are correct. This sweater pattern does not include short row shaping. If you wanted to add them after the collar, before the 1st increase round.